# Vue.js + Webpack
# はじめに
Node.js で Vue.js アプリケーションを開発する際、@vue/cliを使用すれば一発で必要なツールが揃う。
特に@vue/cli 3になって Webpack 等の各種設定がラップされ、デフォルトの設定のままで快適に開発できるようになっている。
本稿では Webpack と Babel で各種設定をしながらビルド環境を整える方法をまとめる。
目次
# プロジェクトの作成
$ npm init
$ mkdir src
$ mkdir src/components
以下のようにファイルを作成する。
$ touch .babelrc.js webpack.config.js /
      src/App.vue src/index.html src/main.js /
      src/components/HelloWorld.vue
/
├ .babelrc.js
├ package.json
├ webpack.config.js
└ src
  ├ App.vue
  ├ index.html
  ├ main.js
  └ components
    └ HelloWorld.vue
# 各種ツールのインストール
# Vue 関連
vue- Vue.js 本体
vue-loader- 単一ファイルコンポーネントで書かれた
.vueファイル内の<template>と<style>を各種 loader に関連付ける vue-template-complierと一緒に使う
- 単一ファイルコンポーネントで書かれた
vue-template-compiler.vueファイルを Vue 2.0 ベースのレンダー関数に変換するvue-loaderと一緒に使う
# JS 関連
babel-loader- Webpack でバンドルする時に babel でトランスパイル
@babel/core- ES6 以降で書かれた JavaScript を ES5 にトランスパイル
- v7 以降は
babel-coreではなく、@babel/coreなので注意
@babel/preset-env- 最新版の JavaScript をES5 にトランスパイルするためのプリセット
# CSS 関連
css-loader- Webpack でバンドルする時に、
.cssファイルと.vue内の CSS を集めて文字列に変換
- Webpack でバンドルする時に、
vue-style-loadercss-loaderで文字列に変換した CSS を HTML ドキュメントの<head>タグ内の<style>タグに埋め込むcss-loaderと一緒に使う
# HTML 関連
html-webpack-plugin- バンドルした JavaScript ファイルを
index.html内の<head>タグ内の<script>タグに埋め込み、distフォルダに出力する
- バンドルした JavaScript ファイルを
# Webpack 関連
webpack- ES Modules の依存関係を解決してファイルをバンドルする
node_modules内のライブラリ (CommonJS、AMD) をバンドル- 各種 loader で
.js以外のファイルも読み込める
webpack-cli- Webpack を CLI で動かすために必要
webpack-dev-server- 開発用サーバを立てるために必要
これらを npm でインストールする。
& npm i --save-dev vue vue-loader vue-template-compiler \
                   babel-loader @babel/core @babel/preset-env \
                   css-loader vue-style-loader \
                   html-webpack-plugin \
                   webpack webpack-cli webpack-dev-server \
-devオプションをつけることで、package.json内のdevDependenciesに 関連付けさせている。
# Webpack の設定
webpack.config.jsを編集していく。
const path = require('path');
const HtmlWebpackPlugin = require('html-webpack-plugin');
const VueLoaderPlugin = require('vue-loader/lib/plugin');

module.exports = {
  devServer: {
    open: true,
    hot: true,
  },
  entry: './src/main.js',
  module: {
    rules: [
      {
        test: /\.js$/,
        use: 'babel-loader'
      },
      {
        test: /\.vue$/,
        use: 'vue-loader'
      },
      {
        test: /\.css$/,
        use: ['vue-style-loader', 'css-loader']
      }
    ]
  },
  plugins: [
    new HtmlWebpackPlugin({
      template: './src/index.html'
    }),
    new VueLoaderPlugin()
  ],
  resolve: {
    alias: {
      '@': path.resolve(__dirname, 'src/'),
      vue$: 'vue/dist/vue.esm.js'
    },
    extensions: ['*', '.js', '.vue', 'json']
  }
};
# devServer
webpack-dev-serverに関連する設定を指定する。
module.exports = {
  //...
  devServer: {
    open: true
  }
};
open-webpack-dev-serverを立ち上げたとき、ブラウザを自動で開くhot- ファイルを変更するとアプリケーションを自動で更新する
ホットリロード便利。
# entry
依存関係を決定する上での出発点であるエントリーポイントを指定する。
以下のように複数ファイルを指定することも可能。
module.exports = {
  //...
  entry: {
    'app': './src/app.js',
    'main': './src/main.js'
  }
};
Entry Points | webpack | Object Syntax
# module
任意の拡張子のファイルに各種ローダーを割り当てる。
testプロパティ内の正規表現に合致するファイルをuseプロパティで指定したローダーで処理する。
Babel 7 以降ではデフォルトでnode_modulesを除外してくれるらしいので、exclude: /node_modules/を明示する必要はなくなった。
Upgrade to Babel 7 (API) · Babel | Config changes
module.exports = {
  //...
  module: {
    rules: [
      {
        test: /\.js$/,
        use: 'babel-loader',
        // babel 7 ではデフォルトで除外されるので Webpack 側での設定は不要
        // exclude: /node_modules/
        // .babelrc.js で設定するオプションをここに書くこともできる
        options: {
          presets: ['@babel/preset-env']
        }
      },
      {
        test: /\.vue$/,
        use: 'vue-loader'
      },
      {
        test: /\.css$/,
        use: ['vue-style-loader', 'css-loader']
      }
    ]
  }
};
ある程度の規模以上になり Babel の設定項目も増えてくるとwebpack.config.jsも肥大してくるので、Babel の設定は.babelrc.jsに書いた方が良さそう。
# plugins
各種プラグインを設定する。
const HtmlWebpackPlugin = require('html-webpack-plugin');
const VueLoaderPlugin = require('vue-loader/lib/plugin');

module.exports = {
  //...
  plugins: [
    new HtmlWebpackPlugin({
      template: './src/index.html'
    }),
    new VueLoaderPlugin()
  ]
};
html-webpack-plugin はデフォルトで./src/index.ejsを見に行くので、./src/index/htmlを見に行かせるよう指定する。
vue-loaderを使うためにはプラグインに追加する必要がある。
# resolve
モジュールの依存関係を解決する際の振る舞いを設定する。
const path = require('path');

module.exports = {
  //...
  resolve: {
    alias: {
      '@': path.resolve(__dirname, 'src/'),
      vue$: 'vue/dist/vue.esm.js'
    },
    extensions: ['*', '.js', '.vue', 'json']
  }
};
エイリアスを設定することでパスを省略してimportできる。
// エイリアスなし
import '../src/components/LikeButton.vue'
// エイリアスあり
import '@/components/LikeButton.vue'
@vue/cliでは以上のようなエイリアスがデフォルトで設定されている。
vue-cli/base.js at dev · vuejs/vue-cli
また、extensionsプロパティに拡張子の配列を渡すことで拡張子を省略してimportできる。
import '@/components/LikeButton';
異なる拡張子の同名ファイルがあった場合、配列の前にある要素が優先される。
Module Resolution | webpackに依存関係の解決の仕方について詳しく書いてある。
# 各ファイルを準備
Hello World するのに必要なファイルを準備する。
# .babelrc.js
これで最新版の ECMAScript を ES5 に変換できる。
module.exports = {
  presets: ['@babel/preset-env'],
};
# src/App.vue
<template>
  <HelloWorld />
</template>

<script>
import HelloWorld from '@/components/HelloWorld';

export default {
  components: {
    HelloWorld
  }
};
</script>
# src/index.html
<!DOCTYPE html>
<html lang="ja">
  <head>
    <meta charset="UTF-8">
    <meta name="viewport" content="width=device-width">
    <title>Hello World</title>
  </head>
  <body>
    <div id="app"></div>
  </body>
</html>
# src/main.js
import Vue from 'vue';
import App from './App.vue';

new Vue({
  el: '#app',
  render (h) {
    return h(App);
  }
});
# src/components/HelloWorld.vue
<template>
  <div class="hello-world">
    {{ message }}
  </div>
</template>

<script>
export default {
  name: 'HelloWorld',
  data () {
    return {
      message: 'Hello World'
    }
  }
};
</script>

<style scoped>
.hello-world {
  font-size: 24px;
}
</style>
# webpack-dev-serverの立ち上げ
pakeage.jsonに以下のスクリプトを追加する。
+ "scripts": {
+ "serve": "webpack-dev-server --mode development"
+ }
npm run serveとすると、webpack-dev-serverがlocalhost:8080で立ち上がる。
npm run serve
> webpack-dev-server --mode development

i 「wds」: Project is running at http://localhost:8080/
...
webpack.config.jsでopenオプションを有効にしたので、http://localhost:8080が自動で開く。
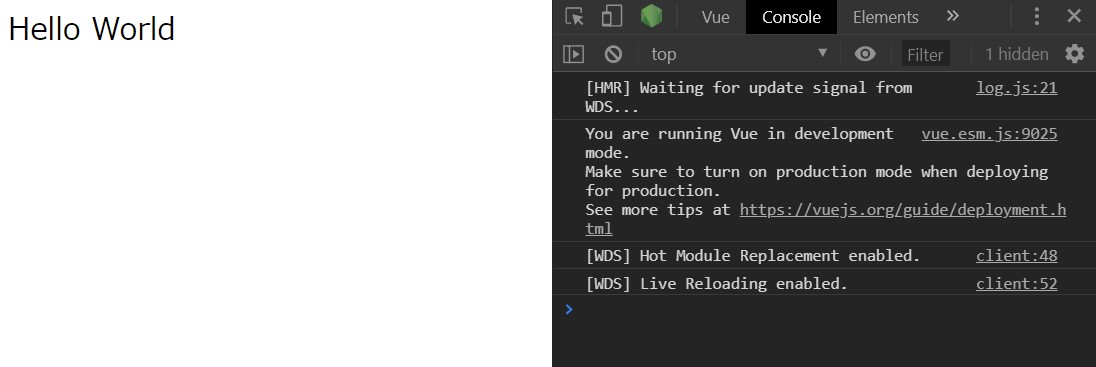
Hello World できた。
# ビルド
rimrafをインストールする。
$ npm i --save-dev rimraf
rimrafはUnixコマンドrm -rfの Node.js 実装版。rm -rfと違って対象ディレクトリがない場合でもエラーを投げないため、ビルドする際のスクリプトを書くのに便利。
pakeage.jsonに以下のスクリプトを追加する。
+ "scripts": {
+ "build:clean": "rimraf dist"
+ "build": "npm run build:clean && webpack --mode production"
+ }
distディレクトリがあれば削除して、新たにdistディレクトリを吐き出している。
$ npm run build
とすると、distディレクトリにindex.htmlとmain.jsが出力される。
# あとで書くやつ
- TypeScript
- Pug
- Sass (SCSS)
- Stylus
# 参考
← 型の判定